Placing an image as a part of your filter
Let say that you've already created your face filter and now you want to put an additional image inside the face filter. The image can be your signature, brand logo or a simple watermark. In this example, you will learn how to do that.
We're going to use a pre-made Lion Face filter. We're going to add the DeepAR logo to be visible just above the user's head.
You'll need to download the example folder with the pre-made Lion Face filter and all assets necessary to go through this example.
Download files1. Create a new effect
After you downloaded our example folder, open the DeepAR studio.
First, you'll have to create a new effect via File → Create new effect.
Next, go to the Node properties and set the Position mode to Position in camera space.

2. Add the face filter
The next thing you'll need to do is to add the face filter.
Go to File → Add Studio File and choose the lion studio file in the image_example/lion folder.
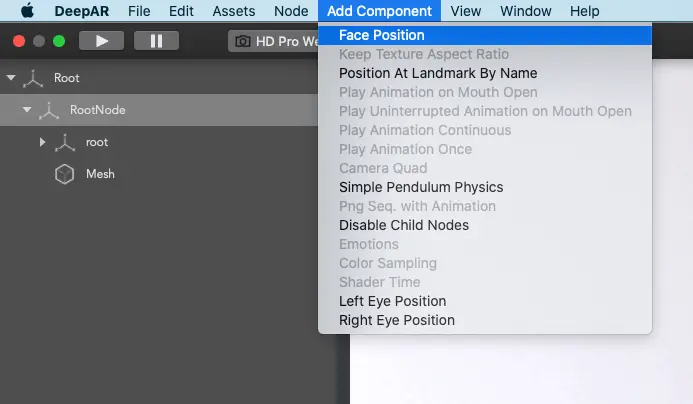
You'll notice that the filter is still nowhere to be seen. To see it on your face you'll need to select the lion root RootNode, then go to the menu tab Add Components tab and Add Face Position component.
3. Quad Image setup
You need to select the Root in the Node hierarchy and add a new quad via Node → Add Quad.
Select the newly added quad, and then go to Node properties to set the Layer to Overlay.

To add the image you want to display, (DeepAR-logo in this case),
go to Texture tab, click Add → Texture and choose the DeepAR-logo.png.

Now set the material:
Select the new
QuadIn Material properties under
Select shaderchoose theUnlit textureFor
Diffuse textureselect theDeepAR-logo.png

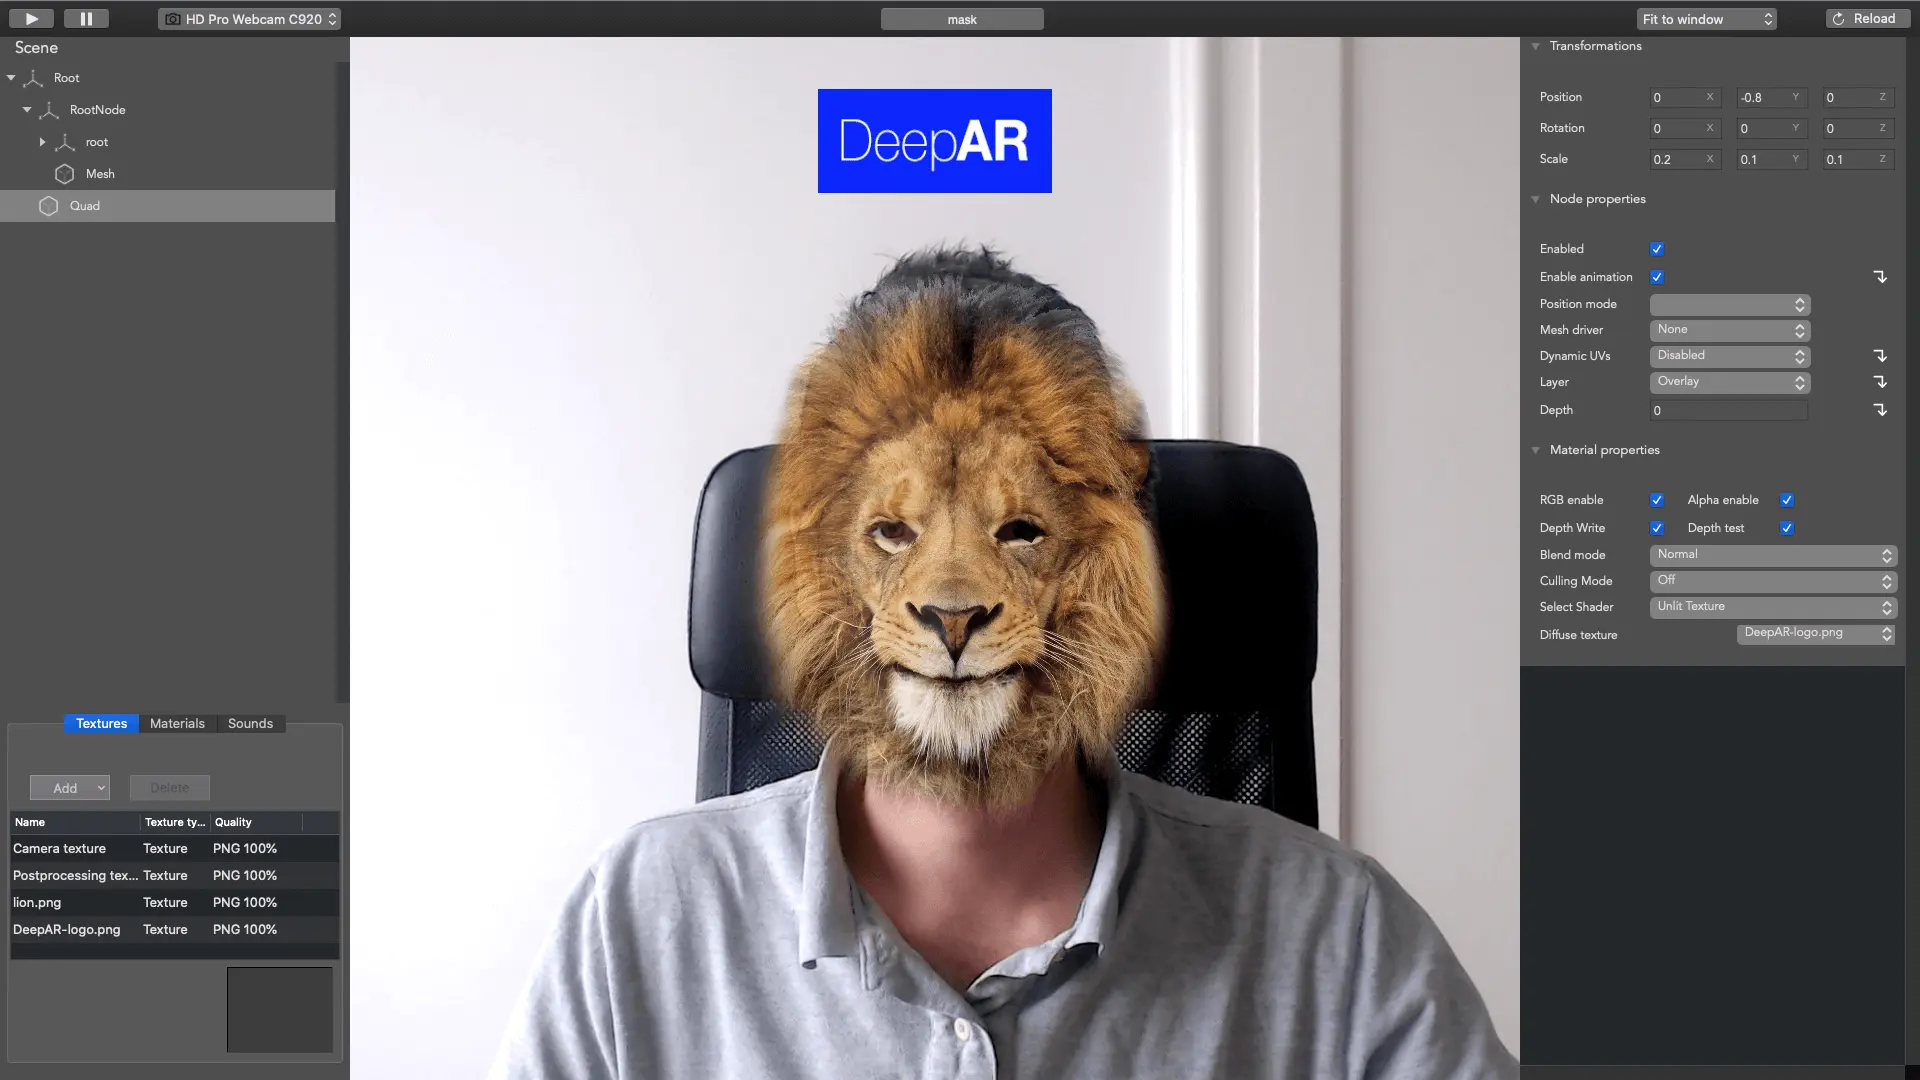
You'll immediately notice that the image has covered everything on your screen, so you'll want to set up the Position and Scale:
![position-and-scale]](/img/studio/guides-and-tutorials/placing-an-image-as-a-part-of-your-filter/position-and-scale.webp)
Here we've set the Position and Scale of the image so it's placed just above the head.
Based on this example, you can now create your own filter that will display the image of your choice and export it to be used in your app.