Preparing assets
Supported 3D File Formats
DeepAR Studio supports the following 3D file formats:
- FBX
- glTF/ GLB
- COLLADA/ DAE
- STL
We recommend using FBX or glTF files, where possible. The following components will be imported:
- Materials
- Meshes
If you're not using glTF, you'll need to import Shaders and Textures separately.
glTF files will also import their Textures and apply them to a PBR shader.
For any other 3D file formats - you can import your object into a 3D editing tool like Blender or Maya and export it as an FBX file.
Assets preparing example
In this example, we will use Blender to prepare a glb file with the materials and textures already set up and ready to use with the Studio.
Adjusting a downloaded model for DeepAR
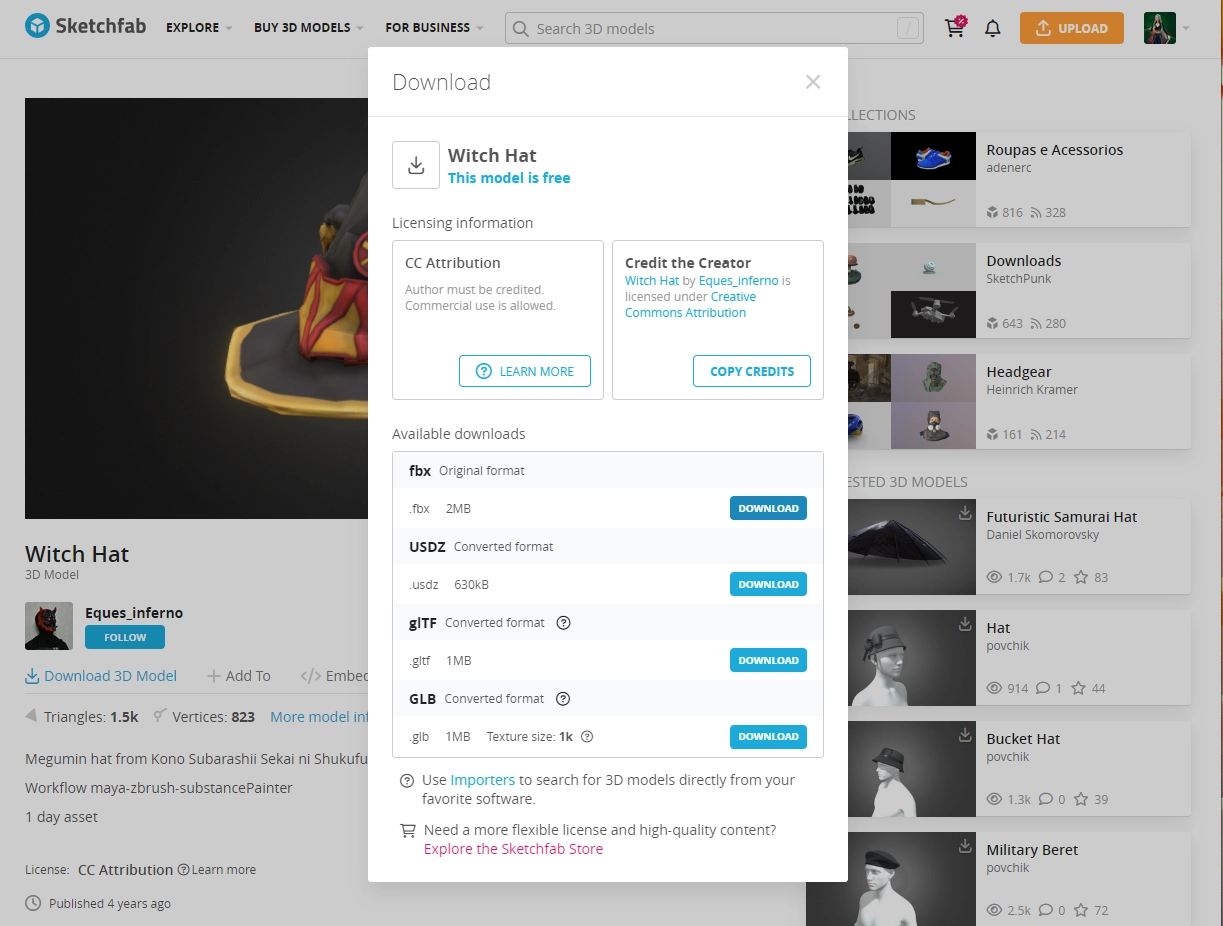
- Assets can be obtained/purchased from any 3D model asset store (Turbosquid, Sketchfab, etc.). In this tutorial, we will use a witch hat made by Eques_inferno as an example. Download the model preferably in fbx+textures or glb/gltf format to import it into Blender.
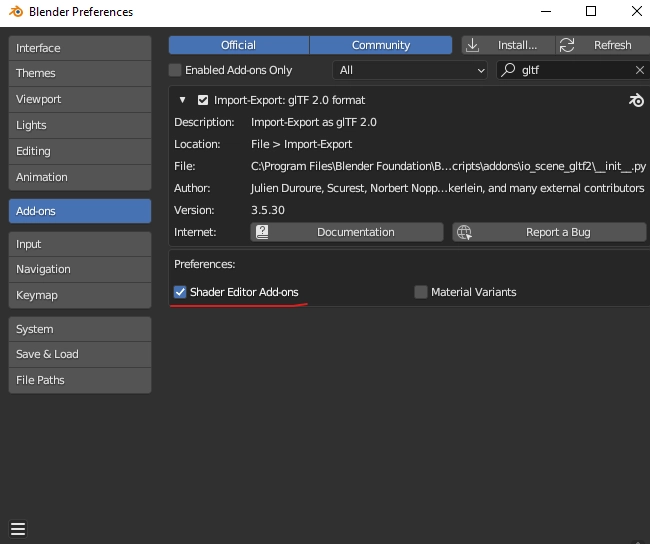
To be able to import-export glb/glFT files activate the addon. In the Edit menu → Preferences → Add-ons search for Import-Export: glTF 2.0 format add-on. Check box Shader Editor Add-ons to be able to add glTF Material Output.
- Choose the import option depending on the format you've downloaded and import the asset into Blender. In our case, we downloaded the hat model in glb format.

- Add a head occluder.

If the imported head occluder has a scale different than 1.0, you can clear the scale (shortcut Alt+S).

Importing the head occluder is important to help you adjust the size and position of the hat model (your asset) according to the size and position of the head occluder. The size and position of the head occluder correspond to the position of the user's head in the augmented reality of the DeepAR Studio.
- Adjust transformations of the hat model to fit the head occluder.

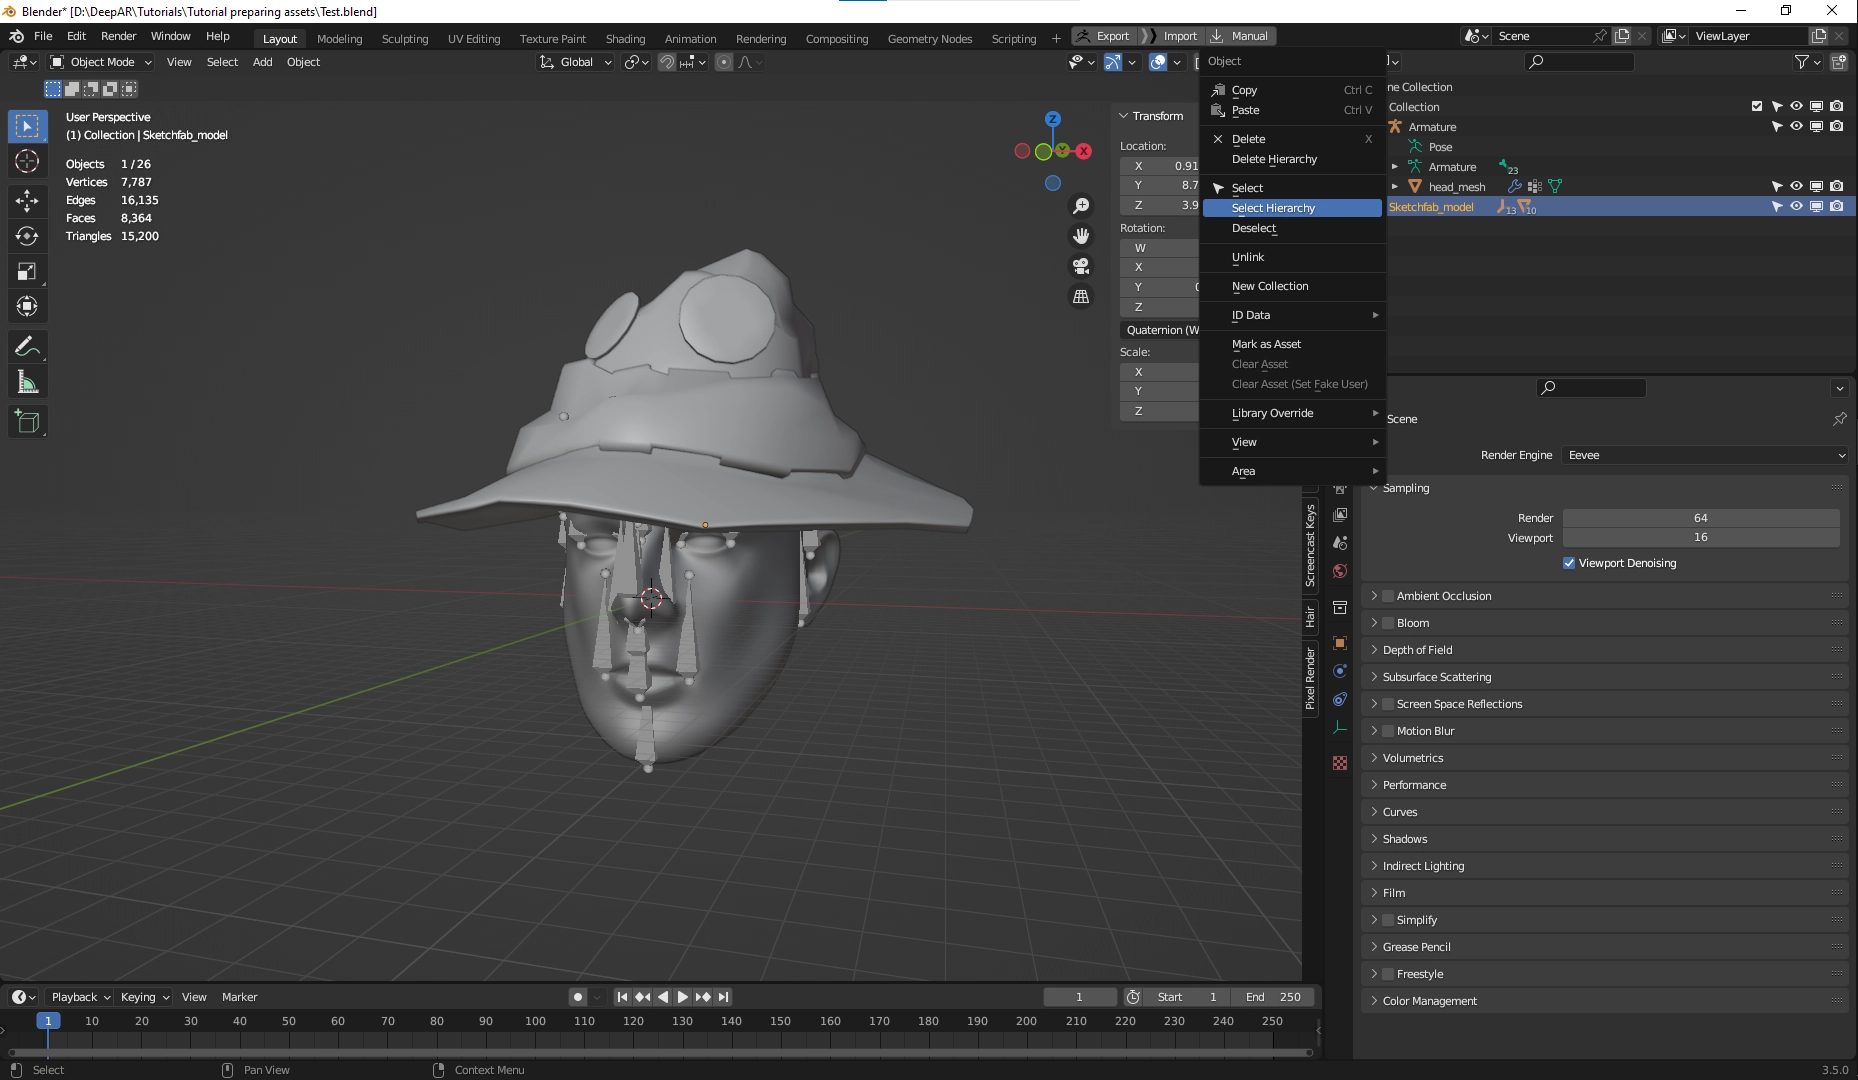
- Select the hat model. If your model has multiple subobjects (as in the example) and you want to apply transformations to all of them, you can right-click on the hat model in the Outliner and select Select Hierarchy.
In the viewport apply transformations to the hat model (Ctrl+A) → All Transforms.

The object origin point should be moved to the global origin, the rotation cleared and scale values set to 1.

DO NOT apply transformations to occluders. If the armature of the face occluder has a rotation or scale different from 1.0, apply rotation and scale only to it.
Setting up the materials
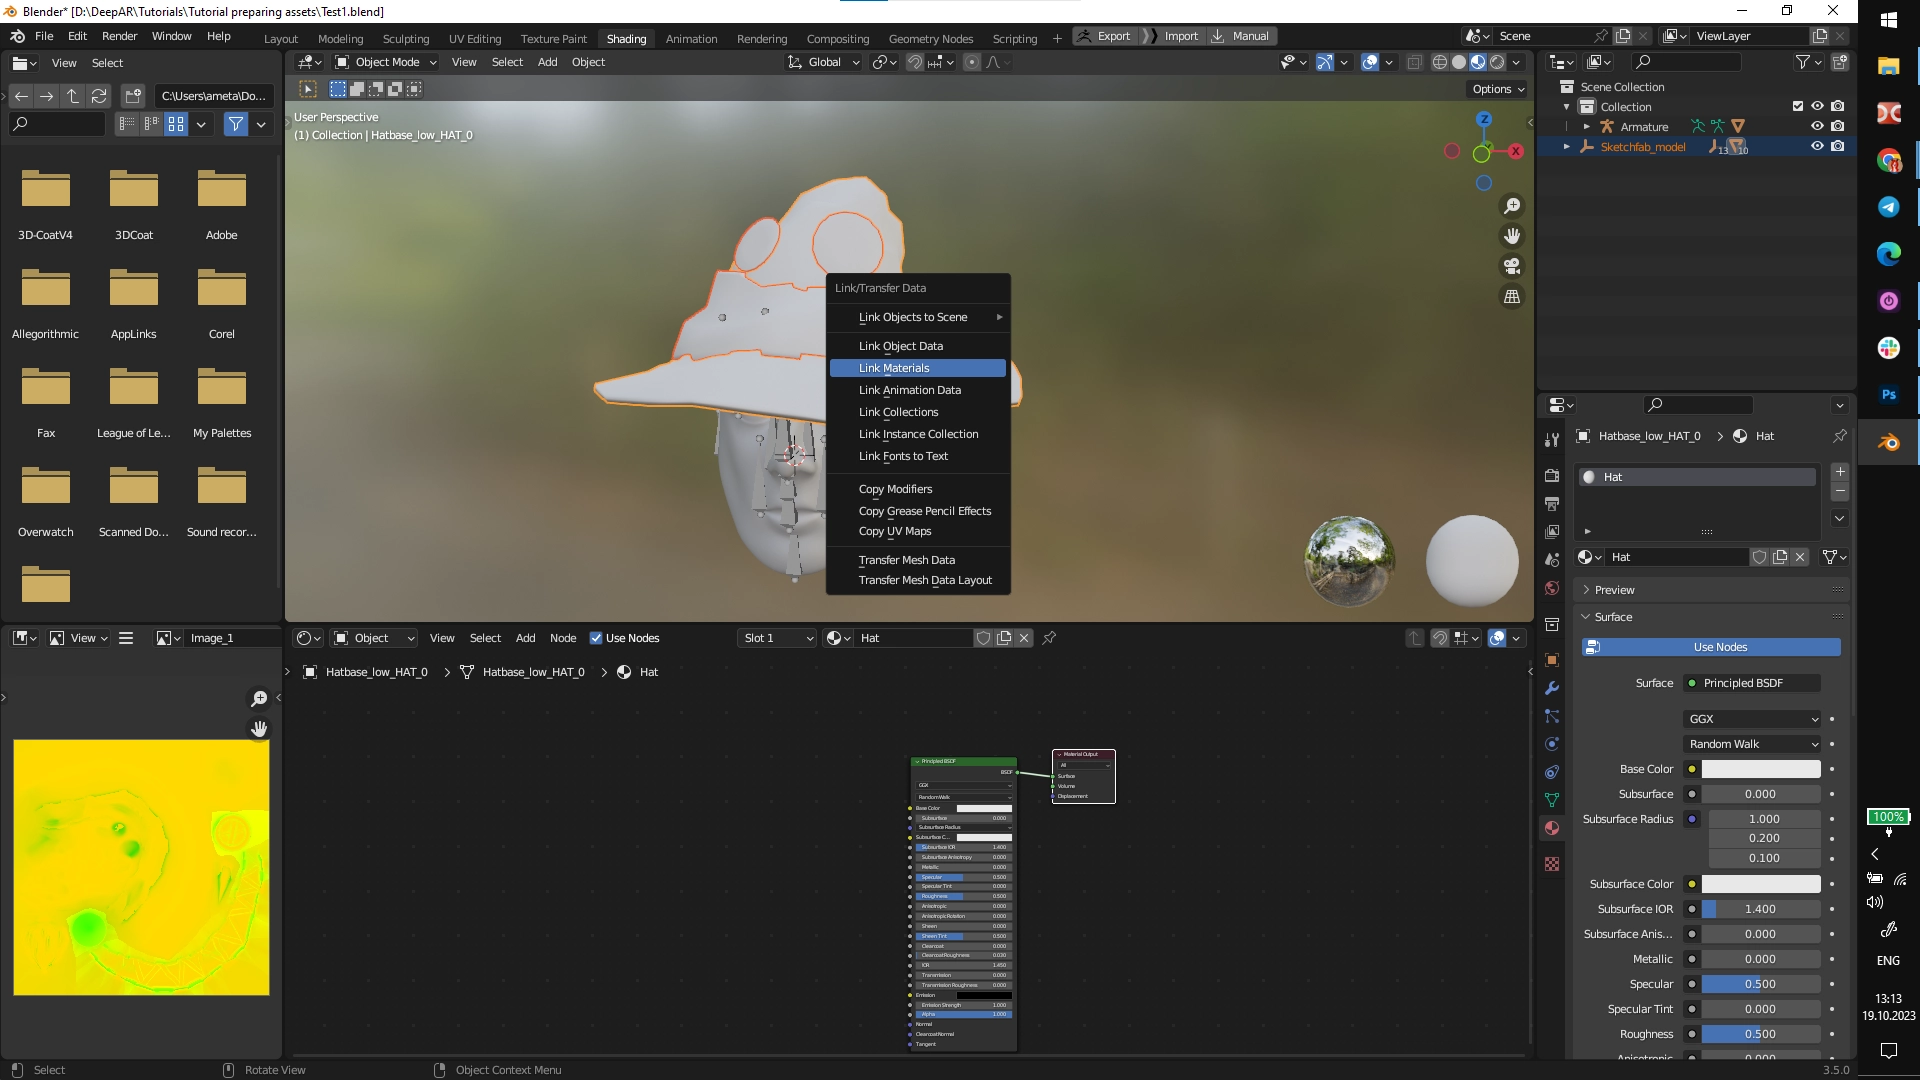
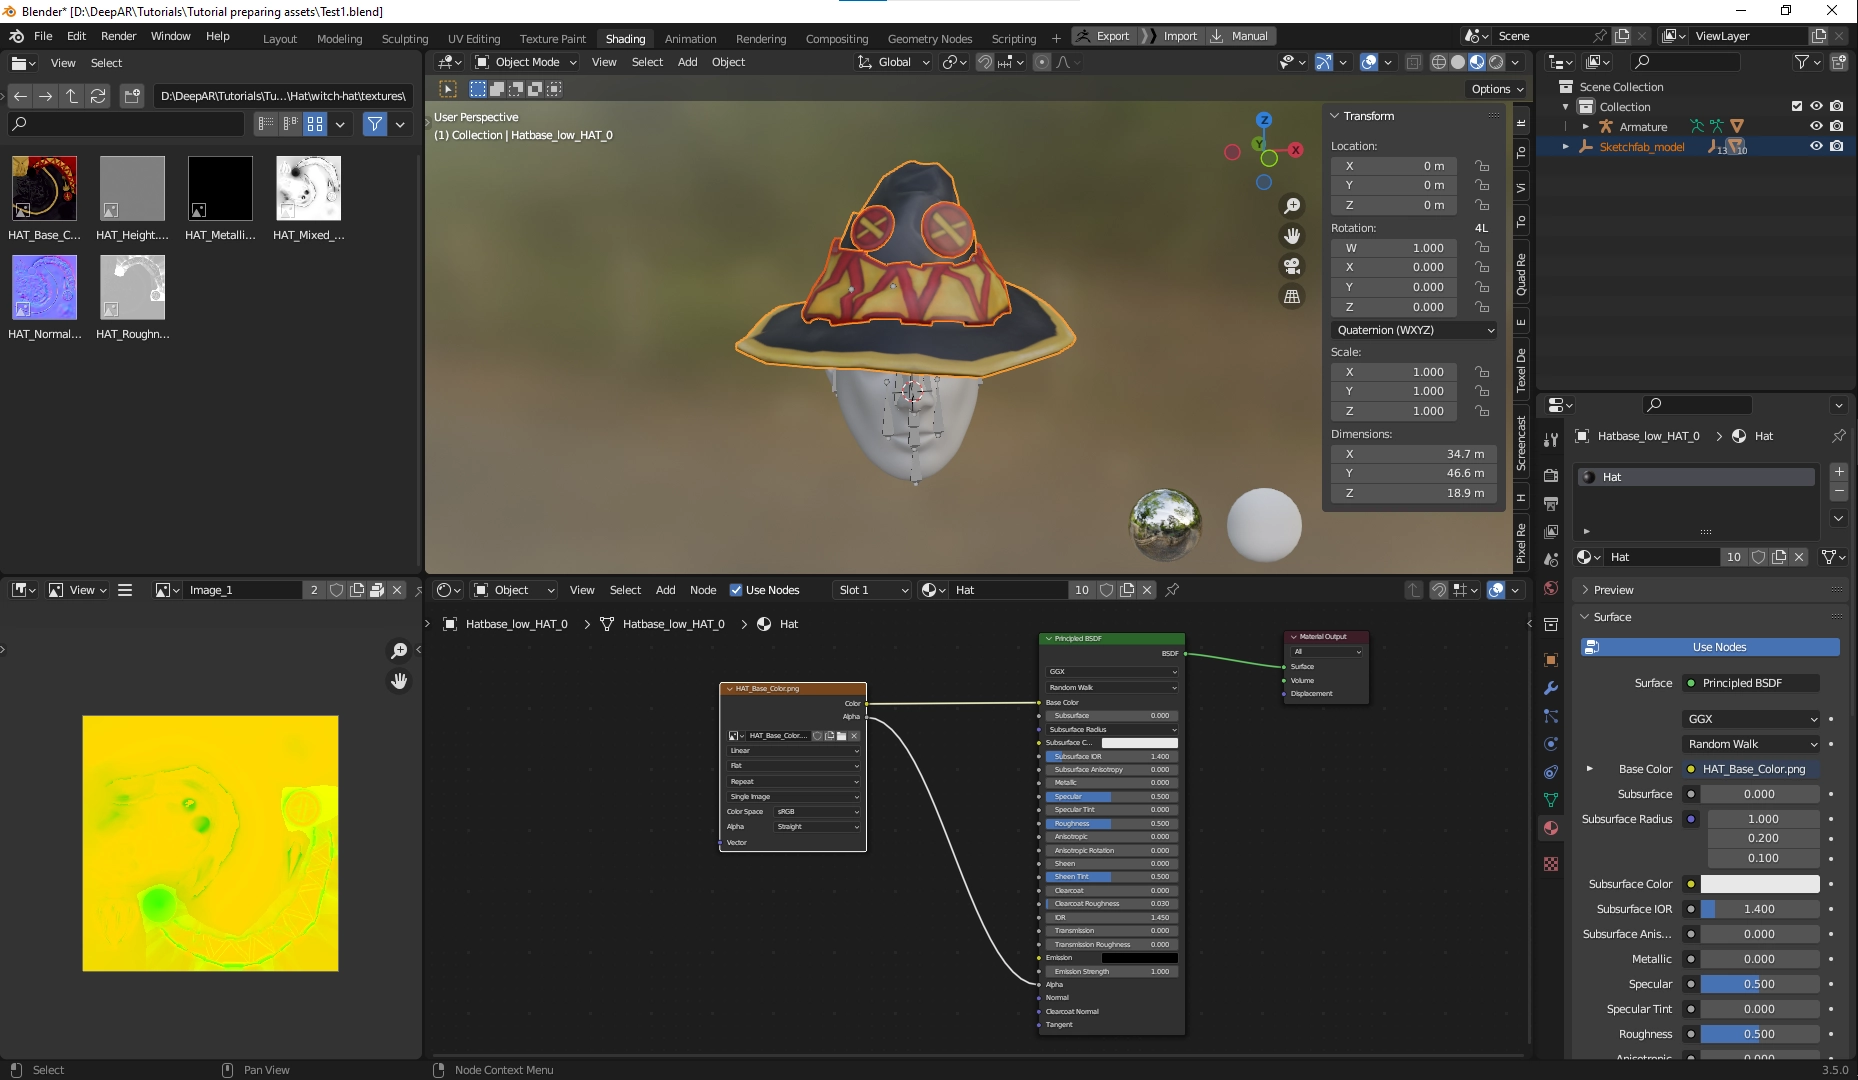
- It's time to set up the material. Select the Shading workspace and select the hat model in the viewport. If you imported a glb or gltf file, the material will already be set up.

If you imported an fbx file or your model does not have a material and textures (or you textured the model yourself), you will first need to create a material for your model.
First of all, select one of the meshes of the hat model and create a material slot.

Create a material and name it meaningfully.

If your model has multiple subobjects, you can assign the material to all subobjects. Select the hierarchy (as in point 5 of this article) and in the viewport holding SHIFT select the object that has the material (Hat). Then press Ctrl+L to link/transfer data and select Link Material. The current material will be applied to all selected objects.
To import textures into Blender you can use the Blender File browser and drag & drop textures in the Shader Editor window or drag & drop textures directly from the File Explorer/Finder to the Shader Editor window.

Drag & drop the base color texture in the Shader Editor window. Connect the color socket of the base color texture node to the Base Color socket of the Principled BSDF shader node (in further just the shader node). If the base color texture has an alpha channel containing transparency information connect the alpha socket of the base color texture node to the Alpha socket of the shader node.
Drag & drop the roughness, metallic, and ambient occlusion texture maps in the Shader Editor window. Set color space in each of these three nodes to Non-Color.

Connect the color socket of the roughness texture node to the Roughness socket of the shader node. Connect the color socket of the metallic texture node to the Metallic socket of the shader node.
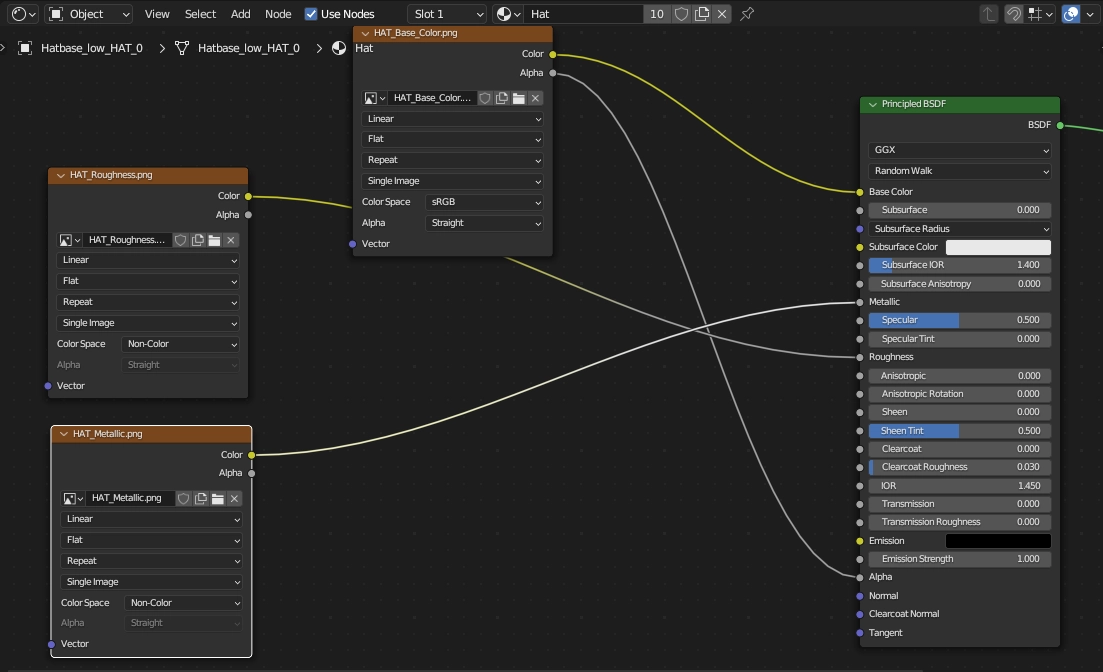
Add node (Shift+A in the Shader Editor window) → Group → glTF Material Output. Connect the color socket of the Ambient Occlusion (AO/Mixed AO) texture node to the Occlusion socket of the glTF Material Output node.

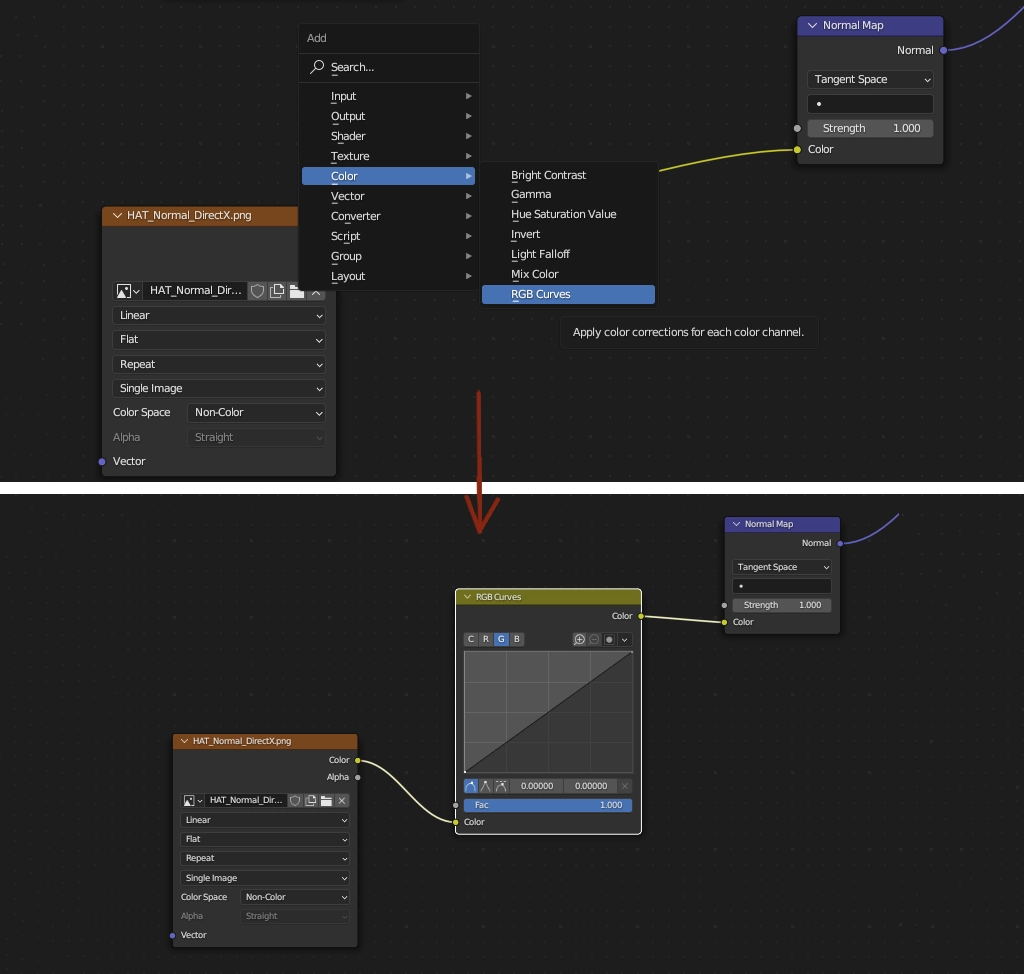
Drag & drop the normal texture in the Shader Editor window. Set the color space of the normal texture to Non-Color. Add new node (Shift+A in the Shader Editor window) → Vector → Normal Map.

Connect the color socket of the normal texture to the Color socket of the Normal Map node. Connect the Normal socket of the Normal Map node to the Normal socket of the shader node.

If your normal texture is created for the DirectX engine (like this hat's normal map) you need to invert the green channel of normal texture because the DeepAR Studio uses OpenGL. You can do it in any software you are used to. Also, you can do it within Blender.
Add s node (Shift+A in the Shader Editor window) → Color → RGB Curves and drop the node on the connection between the normal texture node and the normal map node.
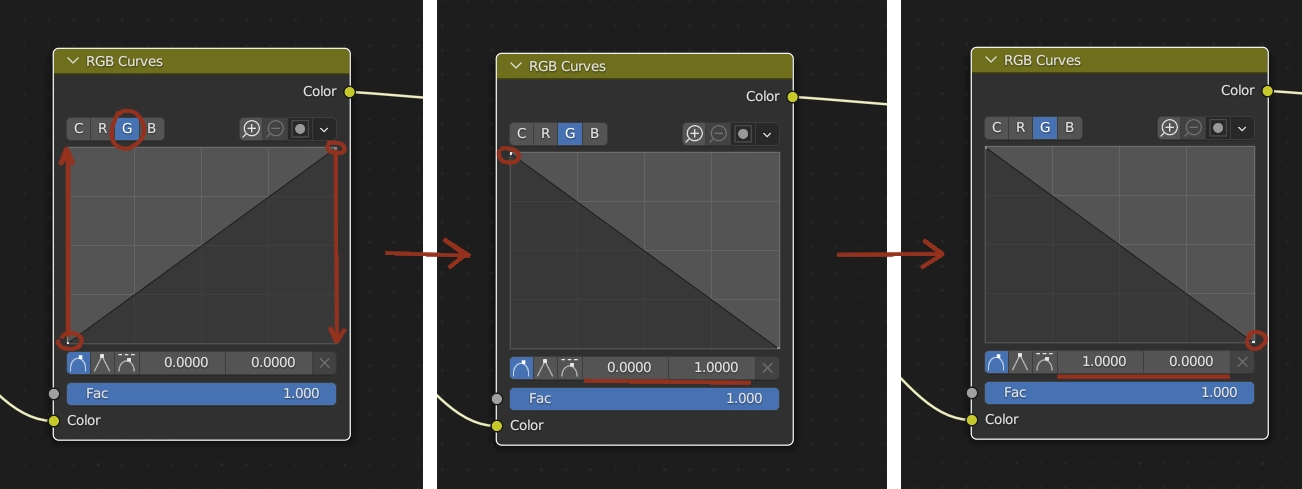
Choose the G channel on the top of the RGB Curves node. Select the left point and move it up to coordinates (0.0,1.0), select the right point and move it down to coordinates (1.0, 0.0).
You don't need to use all textures. The Studio works perfectly even if you connect only one texture.
If your model has glass or other transparent gloss material you can use a transmission map. Connect it to the transmission socket of the shader node.
Adding a face deformation
- For this filter we will also create a simple bone-driven face deformation. Select the face mesh. Go to Object Data Properties and add the basis shape key (blendshape).
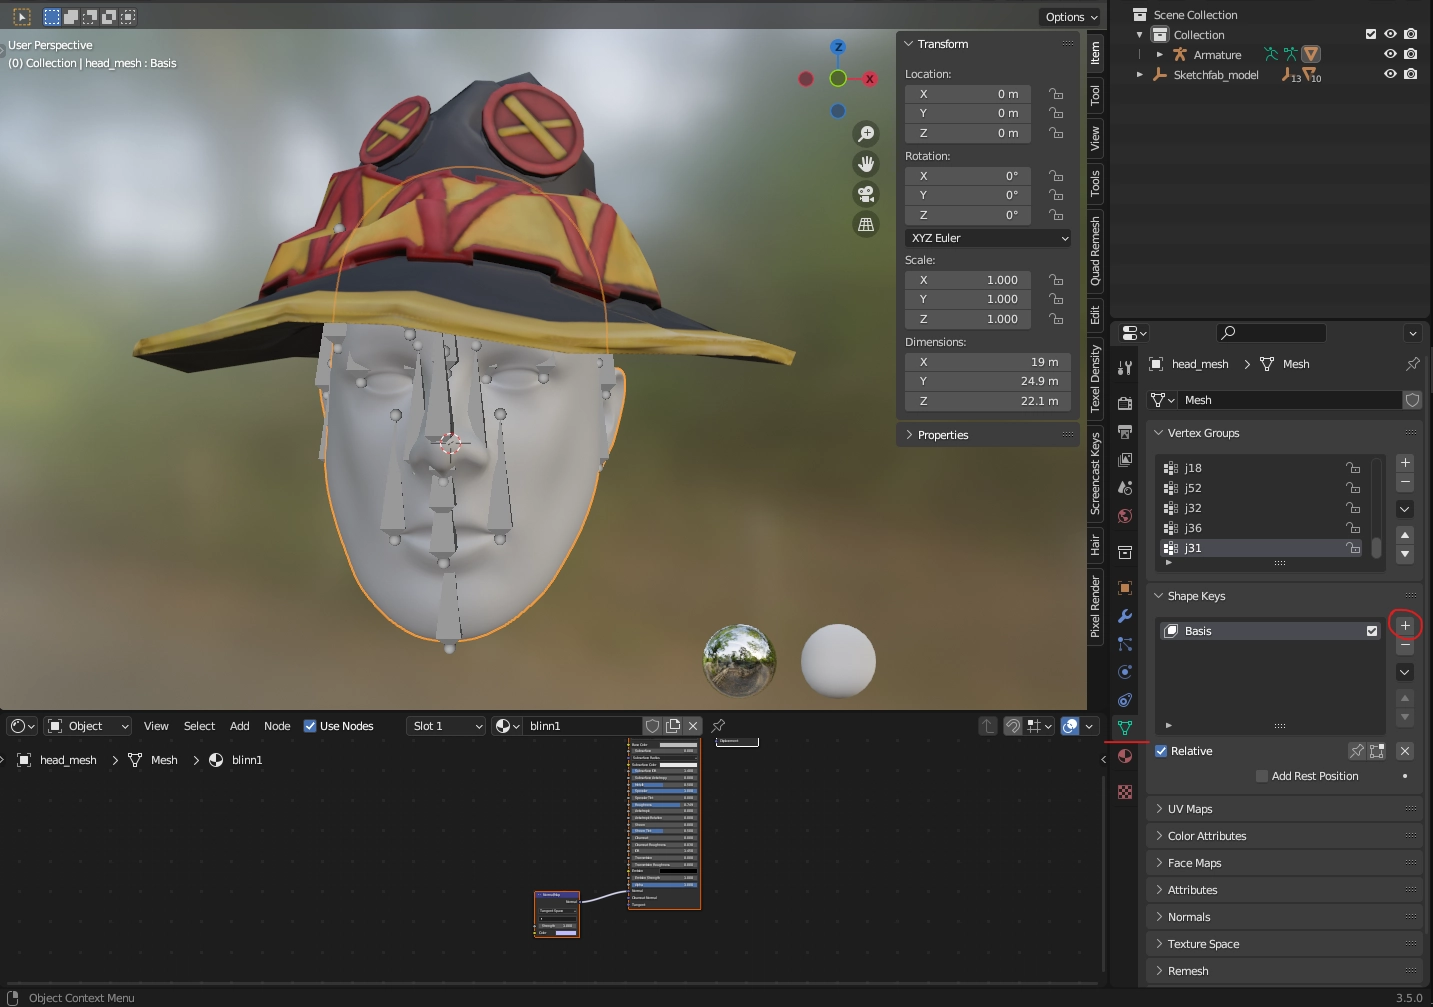
Add a new one-shape key. Select it to make it active and set the value to 1.0.

You can work on the shape key via both editing and sculpting. Choose the way you like best. This step will require at least basic skills in mesh editing and sculpting in Blender. This tutorial will not go into the details of mesh editing and sculpting for more information on those steps, please refer to the documentation or tutorials for your 3D modeling software of choice.
Let’s create a new face shape key that has a bigger nose and two small narrow eyes to go with our hat.

Try to keep the polycount of your model under 25,000 vertices per mesh and under 100,000 polygons in general wherever possible for better performance. You can see the polycount in the Overlay Menu by checking the box Statistics.

- Select all objects you want to export. Go to Export → glTF 2.0.

Check the boxes Selected Objects and Apply Modifiers, name the file, and export it.

Downloads
Download Witch Hat .blend fileDownload Witch Hat .glb fileThe witch hat model was made by Eques_inferno under the CC Attribution license