DeepAR and Amazon IVS iOS integration
Prerequisites
See the prerequisite here.
Sample app
We will showcase the integration with a simple iOS app that shows a camera preview and lets you add fun AR masks and filters. To follow along with this tutorial clone this GitHub repo and open the quickstart-ios-swift.xcworkspace in the XCode.
Install DeepAR SDK
- Run
pod installin the repository to install the Amazon IVS iOS Broadcast SDK. - Download the iOS DeepAR SDK from the DeepAR developer portal here and paste the downloaded
DeepAR.xcframeworkfile in thequickstart-ios-swift/Frameworksdirectory of the sample app. - Create a project with a free plan on the DeepAR developer portal here.
- Add an iOS app in the DeepAR project you just created. Use the app bundle id from the sample app.
- Copy the generated license key from the DeepAR developer portal and paste it into the sample app in the
ViewController.swiftinstead ofyour_license_key_here.
Setup Amazon IVS channel
Copy the Ingest server and Stream key from the Amazon IVS console, and paste them in the ViewController.swift in the kIngestServer and kStreamKey.
Integration steps
The Amazon IVS broadcast SDK provides an API for controlling and capturing device camera images for streaming. To integrate with DeepAR, you will need to provide application logic for controlling the device camera and use the DeepAR SDK to process the images (add AR filters). Then, pass the processed images to the IVS Broadcast SDK via CustomImageSource for streaming.
All the IVS integration logic is contained in setupIVS method.
Create the Broadcast Session
First, create a broadcast delegate function for logging the IVS SDK state changes and errors.
Adopt the IVSBroadcastSession.Delegate protocol in the ViewController class.
class ViewController: UIViewController, IVSBroadcastSession.Delegate {
Implement the delegate functions.
func broadcastSession(_ session: IVSBroadcastSession, didChange state: IVSBroadcastSession.State) {
    print("IVSBroadcastSession did cange state \(state.rawValue)")
}

func broadcastSession(_ session: IVSBroadcastSession, didEmitError error: Error) {
    print("IVSBroadcastSession did emit error \(error)")
}
Create a broadcast session. Use the standard portrait configuration and the default IVS microphone device for sound capture.
let broadcastSession = try IVSBroadcastSession(configuration: IVSPresets.configurations().standardPortrait(),
                                               descriptors: IVSPresets.devices().microphone(),
                                               delegate: self)
Custom image source
Now create a custom image input source for Broadcast IVS SDK. Attach it to the default slot.
let customImageSource = broadcastSession.createImageSource(withName: "deepar-video-source")
broadcastSession.attach(customImageSource, toSlotWithName: "default")
self.customImageSource = customImageSource
Implement the DeepAR SDK delegate method frameAvailable which is called whenever the DeepAR has process the frame.
func frameAvailable(_ sampleBuffer: CMSampleBuffer!) {
    customImageSource?.onSampleBuffer(sampleBuffer!)
}
Start the broadcast session streaming
self.broadcastSession = broadcastSession

let url = URL(string: kIngestServer)
let key = kStreamKey
try broadcastSession.start(with: url!, streamKey: key)
Setup DeepAR camera and preview
Create a DeepAR object. Set you license key. Setup camera preferences. Add the DeepAR view to the view hierarchy to preview the AR stream.
private func setupDeepARAndCamera() {
    self.deepAR = DeepAR()
    self.deepAR.delegate = self
    self.deepAR.setLicenseKey("your_license_key_here")

    cameraController = CameraController()
    cameraController.preset = AVCaptureSession.Preset.hd1280x720
    cameraController.deepAR = self.deepAR
    self.deepAR.videoRecordingWarmupEnabled = false;

    self.arView = (self.deepAR.createARView(withFrame: self.arViewContainer.frame) as! ARView)
    self.arView.translatesAutoresizingMaskIntoConstraints = false
    self.arViewContainer.addSubview(self.arView)
    self.arView.leftAnchor.constraint(equalTo: self.arViewContainer.leftAnchor, constant: 0).isActive = true
    self.arView.rightAnchor.constraint(equalTo: self.arViewContainer.rightAnchor, constant: 0).isActive = true
    self.arView.topAnchor.constraint(equalTo: self.arViewContainer.topAnchor, constant: 0).isActive = true
    self.arView.bottomAnchor.constraint(equalTo: self.arViewContainer.bottomAnchor, constant: 0).isActive = true

    cameraController.startCamera()
}
Wait for DeepAR’s didInitialize delegate function to notify you when DeepAR SDK is setup and ready. That starts the capture of the preview images which we will feed into the IVS SDK as the custom image source. See startCapture.
func didInitialize() {
    deepAR.startCapture(withOutputWidth: 720, outputHeight: 1280, subframe: CGRect(x: 0, y: 0, width: 1, height: 1))
}
Run the app
Now run the app on the device. You should see a camera preview. With left and right buttons, you can change the AR masks and filters.
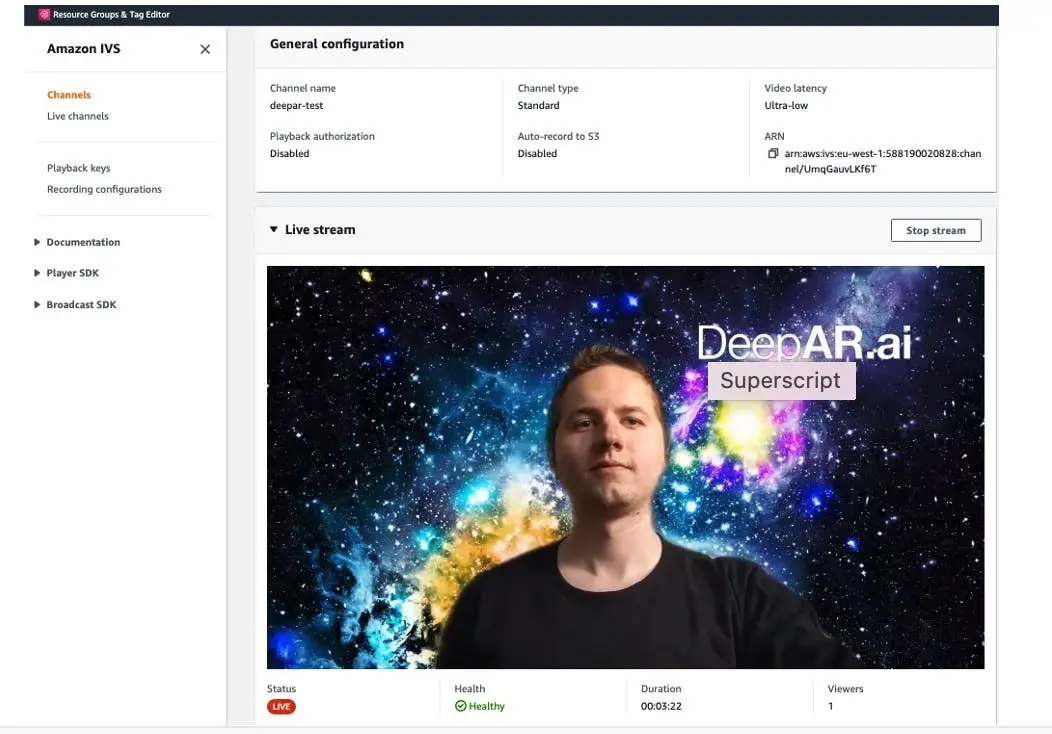
Open the channel you created in the Amazon IVS console and open the live stream tab, then you should be streaming the video augmented with AR effects.
Additional info
Feeding camera frames to DeepAR
In the sample app, we use a DeepAR provided CameraController class to:
- Start and handle the camera.
- Feed the camera frames to DeepAR via the
enqueueCameraFramemethod.
You can use your own implementation of the camera handling logic.
AR filters
AR filters are represented by effect files in DeepAR. You can load them to preview different AR filters.
Places you can get DeepAR effects:
- Download a free filter pack.
- Visit DeepAR asset store
- Create your own filters with DeepAR Studio.
Load an effect using the switchEffect method.
DeepAR Android SDK supports:
- Face filters and masks.
- Background replacement.
- Background blur.
- Emotion detection.
- Hair coloring.
- AR mini-games.